ACTI Quick Set-Up and Usage Guide
v1.0.0 written by Latch Dimitrov - Oct 2014
contact:
latch.dimitrov.00@gmail.com
1.1 ACTI Setup
Extract the acti sub-archive to your "My Documents" folder (i.e. "C:\Users\<user_name>\Documents").
1.2 ACTI Trigger Control Setup
Extract the acti_trig_cntrl sub-archive to your "Assetto Corsa" folder (i.e. "C:\Program Files (x86)\Steam\steamapps\common\assettocorsa").
In Assetto Corsa, go to Options->General and enable the acti app.
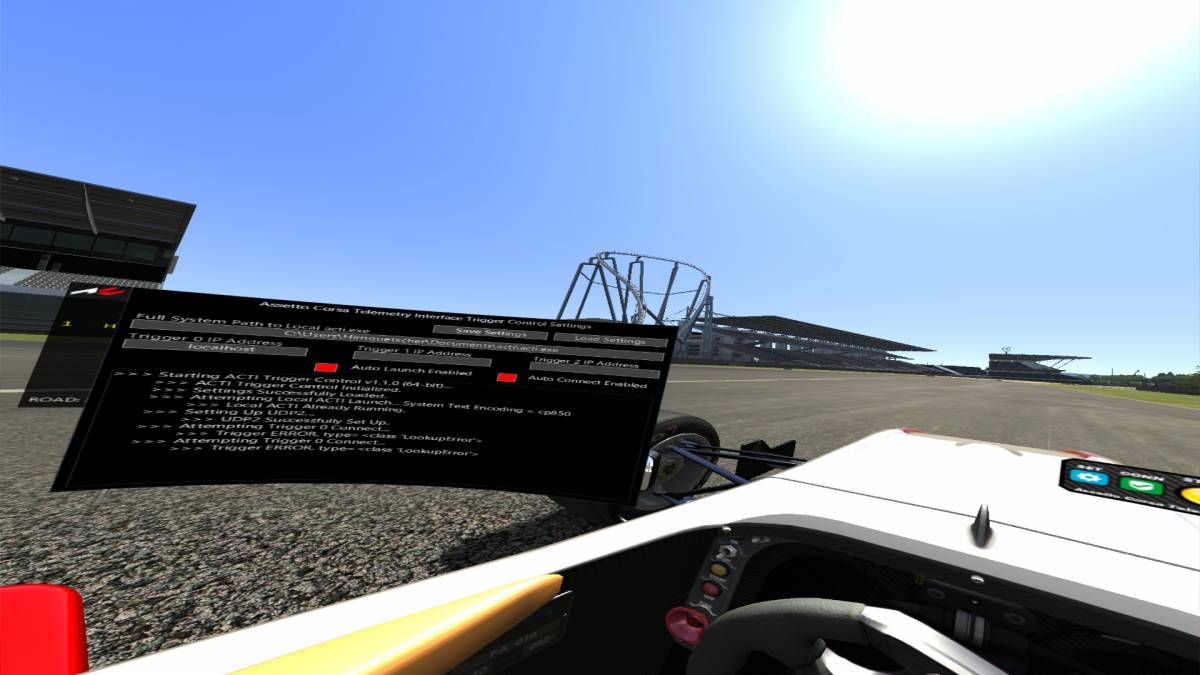
Start an Assetto Corsa in-game session and from the app menu on the right-hand side open the ACTI Trigger Control and ACTI Trigger Control Settings windows.
Enter the full path of your local acti.exe (i.e. "C:\Users\<user_name>\Documents\acti\acti.exe").
Specify the IP address of the computer on which the acti.exe that you want to trigger is running ("localhost" implies that this is the same computer as the one that's running Assetto Corsa). NOTE: If triggering a remote computer, TCP port 27150 and UDP port 27151 must be accessible on that computer while UDP port 9996 must be accessible on the computer running Assetto Corsa.
Set-up the "Auto Launch Enabled" (local acti.exe is launched automatically in-game) and "Auto Connect Enabled" (acti connect is triggered automatically in-game) checkboxes as per your preference.
Click "Save Settings".
Restart the Assetto Corsa in-game session.
(Optional) You can also set the ACTI Trigger Control settings directly through the app configuration file (i.e. "C:\Program Files (x86)\Steam\steamapps\common\assettocorsa\apps\python\acti\config.ini)
1.3 Motec i2 Setup
Extract the mi2_pro_xxx sub-archive to any temporary location and run the installer.
Extract the acti_i2_projects sub-archive to your "MoTeC Projects" folder (i.e. "C:\Users\<user_name>\Documents\MoTeC Projects").
________________________________________________________________________
2.1 Acquiring Telemetry Data ("auto" Trigger Control options ENABLED)
Start an Assetto Corsa in-game session. If all connections were automatically established, telemetry data will automatically start being recorded whenever the driver's car goes out on track (i.e. out of the pits).
2.2 Acquiring Telemetry Data ("auto" Trigger Control options DISABLED)
Start acti.exe from your "acti" folder (i.e. "C:\Users\<user_name>\Documents\acti") or click "Launch" in the in-game acti trigger control window.
Click the green "Connect" button in the in-game acti trigger control window.
If the connection was established, telemetry data will automatically start being recorded whenever the car in question goes out on track (i.e. out of the pits).
(NOTE) You can also initiate subsequent connections from the acti.exe side as long as at least one successful connection attempt took place from the acti trigger control while in the current in-game session.
2.3 Generating Output Telemetry Files
Telemetry output files are automatically generated at the end of stints (i.e. as soon as the car
returns to the pits).
Files can also be generated by the acti user prior to the end of a stint (i.e. while the car is still
on track) by "splicing". There are 3 available ways to "splice":
- Splice & Keep: Output files will be generated as soon as the current lap is completed
while stint data continues to accumulate.
- Splice & Break: Output files will be generated as soon as the current lap is completed
and then the accumulated stint data up to that point will be cleared.
- Force Splice: Output files will be generated immediately while stint data continues to
accumulate.
________________________________________________________________________
3.1 Viewing Live Telemetry Data (ACTI Live Telem Viewer)
Create an ACTI Telemetry Viewer workspace and save it under the "workspaces" folder (i.e.
"C:\Users\<user_name>\Documents\acti\workspaces") (or use the default). Select the
desired workspace by going to Edit->Settings... in acti and saving its path under "Workspace
Path" (absolute path is required).
(Optional) If the chosen workspace has a track map control in it, you have to specify a
reference lap for the Telem Viewer to use. To do this, select a representative lap around the
track in question in Motec's i2 and go to File->Export Data.... Select "Current Range" under
"Data Extent", "CSV File" as the "Output File Format" and "5 Hz" as the "Output Sample
Rate". Click "Export" and save the file in the acti "reference_laps" folder (i.e.
"C:\Users\<user_name>\Documents\acti\ reference_laps "). Then select the desired
reference lap by going to Edit->Settings... in acti and saving its path under "Reference Lap
Path" (absolute path is required).
Open the Live Telem Viewer by going to Live Telemetry->Open Live Telem Viewer in acti.
3.2 Viewing Recorded Telemetry Data (Motec i2)
Start Motec i2 and open the "ACTI Circuit Base" project (i.e.
"C:\Users\<user_name>\Documents\MoTeC Projects\ACTI Circuit Base\Project.mtcprj").
(Optional) Change the layout color scheme by going to Tools->Options...->Colours->Select
Scheme... and choosing Motec Black.
Go to File->Open Log File... and navigate to the track & car combo that you're interested in
under the "acti/telem" folder (i.e. "C:\Users\<user_name>\Documents\acti\telem"). Then
select the stint(s) that you want to load and click "Open".
(Optional) To correctly generate the track (and its boundaries) in i2, first log 3 full laps
around the circuit (1 while driving the racing line, 1 while driving the outer edge of the track
and 1 while driving the inner edge of the track). Go to Tools->Track Editor...->Generate
Track..., select the racing line lap, then select "Lateral G & Speed" under Method and "CG
Accel Lateral" as the Lateral G Channel and click "Ok". Go back to Generate Track..., this
time select the outer edge lap, "GPS" under Method, the GPS Latitude & Longitude channels,
"Outer Line" as the Type and click "Ok". Repeat for the inner edge lap.


 Büro
Büro
